💡: Aclaimant's feature for filtering lists & saving custom filters for reports and more efficient navigation.
How to Use and Create Custom Views
Custom Views in Aclaimant allow you to save your specific searches and filters, making it fast and easy to find the exact safety events, incidents, claims, tasks, or other records you need without having to set up the filters repeatedly. Think of them as your personal, saved filters!
Where can I find Custom Views?
Custom Views are available in the following main tabs within Aclaimant:
- Incidents
- Safety
- Claims
- Tasks
- Files
- Users
- Policies
You have the power to create and save a Custom View on any of these tabs to track the information that matters most to you. For example, you can create a Custom View to see all Safety observations completed by your team, or all Claims that are currently marked as "Open."
Creating a Custom View
- By clicking on the
icon next to Find in view magnifying glass, at the top of your screen, you have the ability to begin creating a new filtered list of results that can be saved to your account for future use.
-
Within this dropdown, you have the power to add as many filter options as you like by continuing to click the '
' icon and selecting the criteria you wish to focus on.
If this is a custom view that you would like to Save for future needs, be sure to hit Save and Save new custom view
- Once you have your filters created, the new & unique Custom View can be given a name and saved to your account so you can return to it at any point to view the same filtered list of results. The newly saved Custom View will be saved to the left side panel, under the "Custom Views" heading.
Video Demonstration on Custom Views
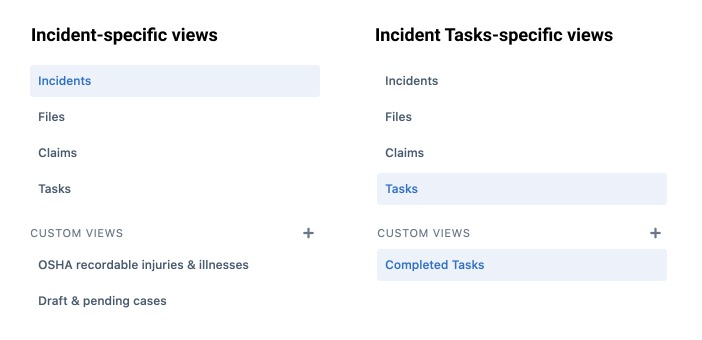
How Custom Views Work
When creating a new Custom View, it will be contextually based on the selected category. For instance, if you are on the 'Incidents' tab and viewing the full list of Incidents and create a new Custom View, it will look for Incidents with the filters you apply. If you have selected Files within the 'Incidents' tab, you will be creating a custom view of Files.
*To generate a report from your custom view, please follow the link on How to Generate a New Report
Comments
Please sign in to leave a comment.